How to Sew a Cloth Face Mask: Easy Home Project
- Petite Designers
- Apr 3, 2020
- 5 min read
Sewing is truly a wonderful skill. When you know how to sew, you can make so many beautiful and valuable things. In today’s blog, we are going to learn how to make a face mask.

We have been thinking about the type of mask we would like to make, and we decided it should be the one that fits nicely and fully touches your face without leaving any gaps. The mask will have three layers of cotton fabric so it doesn’t let drops pass through. Choose some bright colors to make it fun. We hope you will enjoy sewing this project. Let’s start, shall we?

What You Need:
Cotton Fabric - 1 Quarter
1/4’’ Elastic - 14 inches
Scissors, pins, clips
Sewing Machine
Pattern (click here to download)

Step 1: Cut Your Fabric
We have prepared two pattern sizes for you guys: you can make a larger mask that fits adults, or a smaller mask that fits kids. If you decided to sew masks and donate them, choose the bigger size.
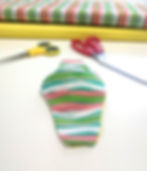
As you can see from the pattern, you will need shell fabric (outside fabric) and lining (inside fabric). You can work with one type of fabric or mix and match like what we do here. You will need to cut 6 pieces total to have 3 layers of cotton fabric once your mask is done. These three layers give you more protection as they don’t allow drops to go through the fabric. Place your pattern on the fabric you are working with, pin it and cut out the fabric following the shape of your pattern.
Step 2: Sew a Shell of Your Mask

Now that you are ready to sew, thread your sewing machine with a coordinating thread. We will be sewing with a basic stitch. If you have a Brother project runway sewing machine, you will work with stitch #1. As always, check the settings: the length of the stitch should be 3.0 instead of 2.5. In case you need to re-stitch, it will be easier to take the tread out.
We decided to make two layers on the shell fabric:
Put matching pieces together with the wrong/bad sides facing each other.
Place all four pieces together and put a basic stitch along the curve only.


When sewing, keep your seam allowance at one quarter of an inch. Do you remember what a seam allowance is? It is a distance from your edge to your stitch. So, for this mask, our seam allowance will be 1/4 ‘’. Don’t forget about your security stitches at the beginning and the end of your stitch.
Step 3: Sew the Lining
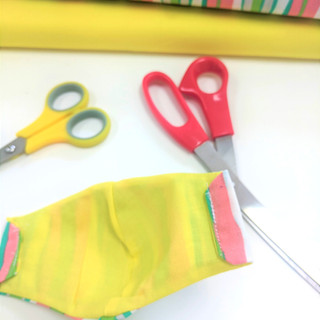
Unless you want to add an extra layer to your lining as well, take two remaining pieces (we have them in yellow) and stitch them together along the curve only with the right sides facing each other. Stitch with a basic stitch keeping your seam allowance 1/4‘’. Security stitch at the beginning and the end. Once you are done, you will notice how the shape of the lining repeats the shape of your shell.

Step 4: Sew the Shell and Lining Together
The two layers of our shell fabric are now connected, and your lining is ready too. You can already see how your mask will be shaped and it looks super cute. In this step, we will sew the outer fabric, or shell, with the inside fabric, or lining.
To sew these two parts, place the lining and the shell together with the right sides facing each other. Make sure that the center seams of both parts are well-aligned. Any misalignment will affect the shape, so be precise here.

When the lining and the shell are connected, pin them all around as you will need to stitch them together.
Take a look at this picture where we show them pinned: on the left side of the mask, we have two horizontal pins indicating a 1.5-inch opening. We are not going to stitch there as we will use this opening to turn our project inside out. We will close it later.

Stitch with a basic stitch all around (leaving the opening on the side) and keep your seam allowance at one quarter of an inch. Make sure to security stitch. It is very important to take the pins out as you go because you shouldn’t stitch over your pins.
!Reminder: Do not stitch between those two horizontal pins. We need that spot open as we will be turning the mask inside out!
Step 5: Turn Your Mask Inside Out
Once you have stitched the shell and the lining together, find that little opening we left on the side and start pushing your mask inside out through that opening. Be very careful, take your time and pay attention to the corners. All sides need to be straight and even; you can even take scissors and push those parts of the mask that you couldn’t straighter with your fingers. When this step is finished, press your mask with a hot iron to give it a proper shape.

Step 6: Sew a Casing
Here comes your favorite word, dear Petite Designers. Casing. Do you remember what it is and why we need it? Casing is that little channel we create for our elastic.
First, we need to close that opening we left for turning our mask inside out. Now we should close it by top-stitching it with a basic stitch. Tuck in the edges and keep your stitch as close to the edge as possible so the edges don’t show.
Now you can make a casing. We decided to make this our last step because having a casing will allow people who wear your mask adjust the length of the elastic easier. So, for the casing, fold the sides of your mask 0.5 inch toward the wrong side and stitch with a basic stitch on the inner side of the fold. This way you will create a little channel where we will later put our elastic.

Step 7: Working with Elastic
Putting elastic through the casing is the last step we need to take. You need to cut two pieces of elastic:
Cut two 7’’ pieces if you make a mask for adults;
Cut two 5’’ pieces if you make a mask for kids.
Take a safety pin and pin it through your elastic. With the safety pin in, put your elastic through the casing. Remove the pin and tie a good knot. You can later hide that knot in the casing. Repeat this step for the other side.
Congratulations! Your beautiful mask is now ready. Make sure to cut off all thread leftover if there are any. You can donate this mask, give it to your friends and family, or wear it yourself. We hope you enjoyed making this little project!
If you have any questions about this project, please feel free to contact us, and we will be happy to help you with this lovely mask.


